
- A vehicle inspection is one of the most important activities in an auto repair workshop. Before recommending repairs or carrying out maintenance, mechanics need to understand the condition of the vehicle and identify areas that require attention.
However, an inspection that is rushed or poorly documented can create problems. Important issues may be overlooked, customers may misunderstand repair recommendations, and mechanics may struggle to explain what they discovered.
A professional vehicle inspection should follow a clear process. It should help mechanics assess the vehicle systematically, record their findings, and communicate the results to customers.
In this guide, we explain how to conduct a professional vehicle inspection in an auto repair workshop, from receiving the vehicle to preparing an inspection report.
What is vehicle inspection?
A vehicle inspection is a systematic assessment of a vehicle's condition to identify faults, wear, damage, safety concerns, and maintenance requirements.
Inspections may be conducted when:
A customer brings in a vehicle with a reported problem.
A vehicle arrives for routine servicing.
A customer requests a general condition assessment.
A used vehicle needs to be assessed before purchase.
A vehicle requires a follow-up inspection after repairs.
A business brings in vehicles for scheduled maintenance.
The scope of the inspection depends on its purpose. A general vehicle condition inspection is not necessarily the same as a detailed diagnostic investigation or a legally required roadworthiness test.
Why Professional Vehicle Inspections Matter
1. They help identify problems accurately
A systematic inspection helps mechanics examine important vehicle components instead of focusing only on the problem initially reported by the customer.
2. They improve customer trust
Customers are more confident when a workshop can explain what was inspected, what was discovered, and why particular repairs are recommended.
3. They reduce misunderstandings
Documented findings provide a reference for discussions about vehicle condition, estimates, and approved repairs.
4. They support better repair decisions
Inspection findings help mechanics determine whether further diagnosis, maintenance, or repair is required.
5. They create useful service records
Keeping inspection records allows the workshop to review previous findings when the vehicle returns.
Step 1: Receive the Vehicle and Understand the Customer's Concern
A professional inspection begins before the mechanic touches the vehicle.
The service adviser or person receiving the vehicle should first understand why the customer has brought it in.
Ask questions such as:
What problem have you noticed?
When did the problem begin?
Does it happen continuously or occasionally?
Are there unusual sounds, smells, or vibrations?
Have you noticed any warning lights?
Has the vehicle recently undergone repairs?
Has the problem become worse over time?
Record the customer's answers accurately.
Do not assume that the customer's description is the final diagnosis. It is the starting point for the inspection.
Also record the customer's details and identify the vehicle using information such as its make, model, and registration number.
Step 2: Carry Out an Initial Visual Inspection
Before beginning detailed checks, examine the general condition of the vehicle.
The initial visual inspection may include:
Visible body damage.
Cracked glass or mirrors.
Damaged lights.
Tyre condition.
Visible fluid leaks.
Damaged exterior components.
Signs of previous repairs.
Other obvious concerns.
Document existing damage where appropriate.
Photographs can help establish the vehicle's condition when it arrived and reduce disagreements about damage that may have existed before the repair.
Step 3: Inspect the Engine Compartment
The engine compartment contains several components that require regular attention.
Depending on the vehicle and inspection requirements, check:
Engine oil level and visible condition.
Coolant level and visible leaks.
Brake fluid level.
Other relevant fluid levels.
Battery condition and connections.
Visible belts and hoses.
Air intake components.
Signs of oil or coolant leakage.
Unusual noises, where the engine can safely be operated.
Do not open a hot cooling system or handle components without following appropriate safety procedures.
Record anything unusual and recommend further investigation where necessary.
Step 4: Inspect the Braking System
The braking system is critical to vehicle safety.
Depending on the inspection scope and available access, examine:
Brake pad condition.
Brake disc or drum condition.
Visible brake fluid leaks.
Brake hoses and lines.
Parking brake operation.
Brake pedal feel.
Warning indicators.
If further inspection requires wheel removal or dismantling, follow the appropriate workshop procedures.
Document any safety-related concerns clearly and explain whether the vehicle should remain out of service until the issue is addressed.
Step 5: Check the Tyres and Wheels
Tyres affect vehicle handling, braking, and road safety.
Inspect:
Tyre tread depth.
Tyre pressure.
Uneven wear patterns.
Cuts, bulges, and visible damage.
Wheel condition.
Wheel nuts and fastening condition.
Spare tyre condition, where applicable.
Uneven tyre wear may indicate alignment, suspension, pressure, or other problems that require further assessment.
Record the findings and recommend the appropriate next step.
Step 6: Inspect the Suspension and Steering Systems
The suspension and steering systems affect stability, comfort, and vehicle control.
Depending on the vehicle, check:
Shock absorbers and struts.
Springs.
Control arms.
Bushings.
Ball joints.
Tie rods.
Steering components.
Visible damage or leaks.
Unusual play or noise.
A road test may help investigate certain symptoms, but it should only be carried out when the vehicle is safe to operate and the test is appropriate.
Record components that require further inspection or replacement.
Step 7: Check the Electrical System and Lights
Electrical problems can affect several vehicle systems.
A general electrical inspection may include:
Battery condition.
Battery terminals.
Charging system indicators.
Headlights.
Brake lights.
Indicators.
Hazard lights.
Reverse lights.
Interior lighting.
Visible wiring concerns.
Where a warning light or electrical fault is reported, additional testing may be required to identify the cause.
Do not replace components based solely on the presence of a warning indicator without carrying out appropriate checks.
Step 8: Carry Out Diagnostic Checks Where Necessary
Some vehicle problems cannot be identified through visual inspection alone.
When necessary, use suitable diagnostic equipment to investigate reported symptoms and system faults.
Depending on the vehicle and equipment, this may include:
Reading diagnostic trouble codes.
Reviewing available live data.
Checking relevant sensor readings.
Investigating electrical faults.
Performing additional mechanical tests.
An OBD scanner can help retrieve information from supported vehicle systems, but diagnostic trouble codes do not automatically identify the exact component that has failed.
Mechanics should interpret the results and carry out further testing before confirming a diagnosis.
Step 9: Document Every Inspection Finding
A professional inspection should produce a clear record of what was checked and what was discovered.
Use a consistent inspection checklist.
For example:
Inspection itemStatusNotesEngine compartmentAttentionVisible oil seepage requires further assessmentBrakesPassNo immediate concern identified during inspectionTyresAttentionUneven wear observedBatteryPassNo visible terminal damageLightsPassInspected lights functioningSuspensionAttentionFurther assessment recommendedThe examples are illustrative. Actual inspection results must reflect the vehicle's condition.
A useful inspection report should distinguish between:
Items that passed inspection.
Items requiring attention.
Items that failed inspection.
Items that were not applicable or not inspected.
Add photographs where they provide useful evidence or clarification.
Step 10: Explain the Findings to the Customer
After the inspection, explain the results in language the customer can understand.
Avoid relying entirely on technical terms.
For each issue, explain:
What was discovered.
Where the issue is located.
Why it matters.
Whether it requires immediate attention.
What action you recommend.
For example, rather than simply saying, "The suspension bushings are worn," explain how the condition may affect vehicle stability, handling, or tyre wear.
Be honest about uncertainty. If additional diagnosis is required, explain that the inspection has identified a concern but further testing is needed to confirm its cause.
Step 11: Prepare an Estimate for Recommended Repairs
Once the findings have been explained, prepare an estimate for the work the customer may need.
The estimate should clearly identify:
Recommended repair or maintenance.
Parts required.
Labour charges.
Other applicable costs.
Total estimated amount.
Any relevant conditions or exclusions.
Separate urgent repairs from work that can be scheduled for later.
Allow the customer to review the estimate and obtain approval before carrying out the proposed work.
If additional problems are discovered during repairs, communicate them and obtain the required approval before proceeding.
Step 12: Keep the Inspection Report for Future Reference
Do not discard inspection findings after the customer collects the vehicle.
Store the report with the relevant customer and vehicle records.
This allows your workshop to:
Review previous inspection results.
Monitor recurring concerns.
Check whether recommendations were completed.
Compare vehicle condition over time.
Provide more informed service during future visits.
Good inspection records are particularly useful when customers return with similar problems.
Common Vehicle Inspection Mistakes to Avoid
1. Rushing through the inspection
A rushed inspection can cause important issues to be overlooked. Follow a consistent checklist and allow enough time for the required checks.
2. Failing to document findings
Verbal explanations may be forgotten or misunderstood. Record inspection results clearly.
3. Recommending repairs without proper assessment
Recommendations should be supported by actual findings and appropriate diagnostic procedures.
4. Ignoring the customer's original complaint
An inspection should consider the customer's reported concern while also checking other relevant areas.
5. Using technical language customers do not understand
Explain findings in simple language and provide supporting photographs where helpful.
6. Failing to distinguish urgent and routine issues
Customers need to understand which concerns require immediate attention and which can be scheduled.
7. Losing inspection records
Keep inspection reports organised and linked to the correct vehicle.
How Workshop Management Software Can Improve Vehicle Inspections
Managing inspections with paper checklists can become difficult as your workshop handles more vehicles.
Workshop management software can help standardise inspection procedures, document findings, and keep records organised.
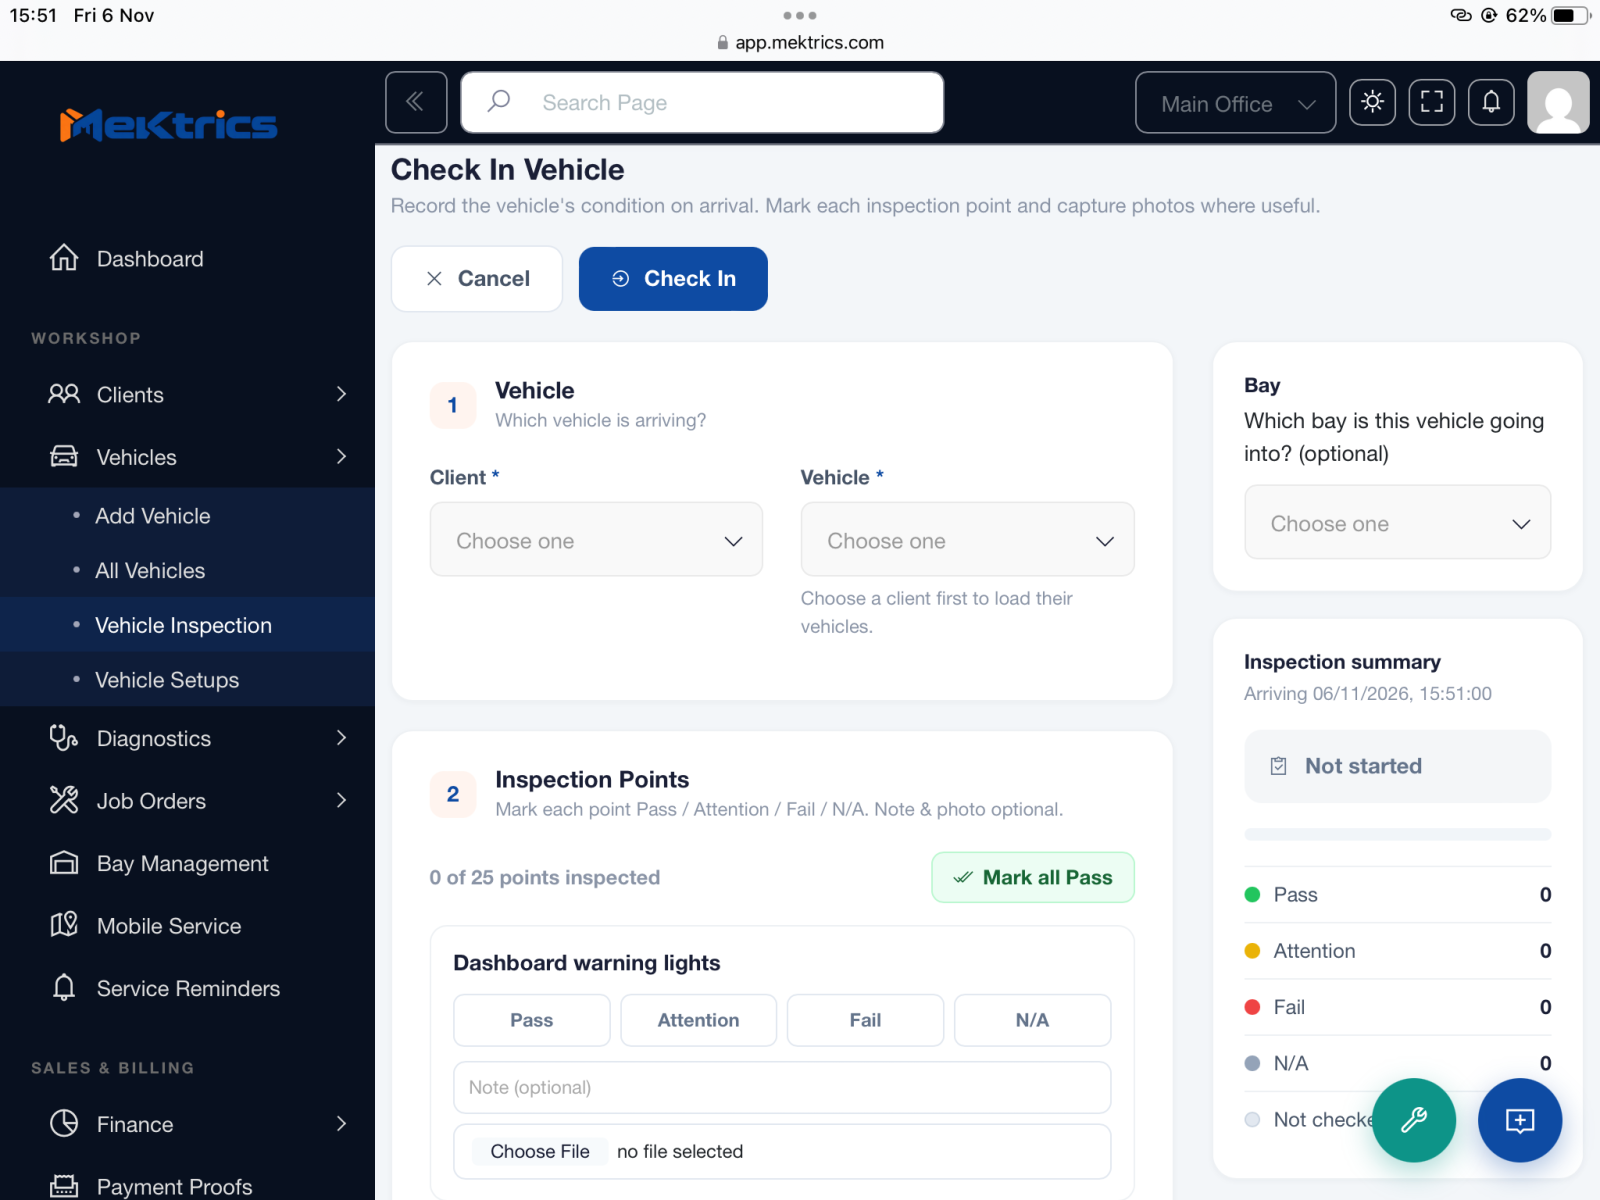
Mektrics provides a vehicle inspection workflow that includes a 24-point check-in inspection. The process supports Pass, Attention, Fail, and Not Applicable statuses, along with notes and photographs.
Mektrics also provides vehicle diagnosis workflows, helping workshops organise diagnostic activities and related information.
Using structured inspection and documentation processes can help your team work more consistently and provide customers with clearer information about their vehicles.
Visit Mektrics.com to learn more about managing vehicle inspections and other workshop activities.
Frequently Asked Questions
1. What should be included in a professional vehicle inspection?
A professional inspection may cover the engine compartment, brakes, tyres, suspension, steering, battery, electrical systems, lights, and other relevant components. The exact checklist depends on the vehicle and purpose of the inspection.
2. How long should a vehicle inspection take?
Inspection time depends on the vehicle, the scope of the checks, and whether additional diagnostic testing is required. A basic visual inspection will generally take less time than a detailed mechanical assessment.
3. What is the difference between vehicle inspection and vehicle diagnosis?
A vehicle inspection involves assessing the general condition of components and identifying visible or measurable concerns. Diagnosis involves investigating a particular fault or symptom to determine its underlying cause. They may overlap, but they are not the same process.
4. Should mechanics take photographs during vehicle inspections?
Photographs can be useful for documenting visible damage, worn components, leaks, and other findings. They help explain inspection results to customers and provide supporting records.
5. What are Pass, Attention, Fail, and N/A inspection statuses?
They are categories used to communicate inspection results. Pass means no relevant concern was identified during the check; Attention indicates an issue requiring consideration; Fail indicates an unacceptable condition; and N/A means the item does not apply or was not relevant to that inspection.
6. Can software help create vehicle inspection reports?
Yes. Some workshop management systems provide digital inspection checklists and reporting tools. The available functions vary, so workshops should choose a system that supports their inspection requirements.
Conclusion
A professional vehicle inspection requires more than checking a few components and telling the customer what needs fixing.
It involves understanding the customer's concern, examining the vehicle systematically, documenting findings, explaining recommendations, and keeping records for future reference.
By establishing a standard inspection checklist and training your mechanics to follow the same process, your workshop can improve consistency, reduce misunderstandings, and provide a better customer experience.
As your workshop grows, consider using digital inspection tools to organise the process and keep vehicle information accessible.
Want to improve how your workshop handles vehicle inspections and repair records? Visit Mektrics.com to learn more about tools designed for auto repair workshop management.

0 Comments